
I’ve just started a project where I’ve had to set up Team City from scratch. Whilst I’ve used Team City extensively I’ve never had to start from the beginning, so I thought I’d document the steps I took.
TeamCity is a Continuous Integration tool is free to use for small teams. It connects to your source control repository and can automatically trigger builds when changes are pushed into the repo.
You can download it and get more information from here https://www.jetbrains.com/teamcity/
Once downloaded, double click the exe file to start installing.
You will get a “Welcome to Team City setup” page, click on Next.
Licence Agreement, click on I Agree.
Then select the destination folder, I’ll keep with the default which is c:\teamcity but you can put it wherever suits.
You can than select which components, I’ll just take the default which is everything which, at time of writing, requires 1.1GB.
It then starts installing, this took about 5 minutes.
You then need to select the TeamCity server port, by default this is 80. It will tell you if that port is already busy so you can allocate a different one.
It will then show you the “Configure Build Agent Properties” which is all the details that are set as standard. You can add to this if you need to.
Once you are happy click on Save.
It will then ask for the service account to use, this can be changed afterwards. If you don’t have a service account set up you can use the SYSTEM Account however, you may have problems later on. I’m going to use the SYSTEM account and will probably go back and change this later, which you can do by opening the services and finding the TeamCity service and amending it that way.
It will then ask you which services you want to start so click on next and then you get the “Completing the JetBrains TeamCity Setup Wizard” so click on Finish.
It then automatically loads the web page, and asks you where to store the path, then it asks about database connection setup. I selected the database type of “Internal” for simplicity sake.
It will then create your TeamCity database on the instance you specify in the previous step, this does take a few minutes so be warned, or go and make a cuppa!!
You then need to accept the licence agreement by reading/scrolling all the way to the bottom. You then get prompted to set up an administrator account.
Team City then opens on the General page which is where you can update your profile if necessary.
Now we need to create a project, to do this click on Projects and then Create Project.
You then get the options of which source control repository you are linking to, I’m going to select “From Bitbucket Cloud” but you can select whichever is most appropriate.
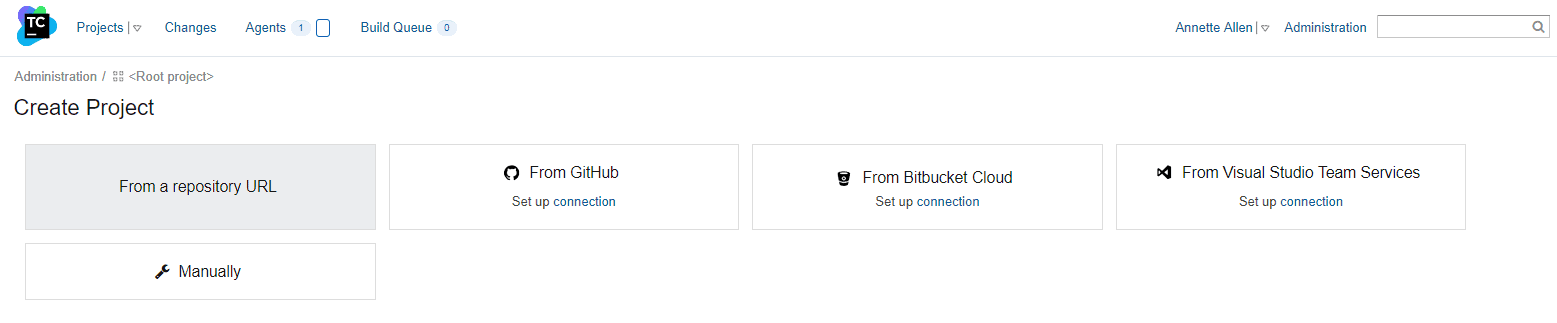
You will then need to set up the connection.
The next step we need to do is set up our connection to source control so that whenever we check anything in our build automatically runs. I’m using BitBucket but this process works for pretty much any source control repository.
You will then need to enter the repository URL the username and password used to connect your repo.
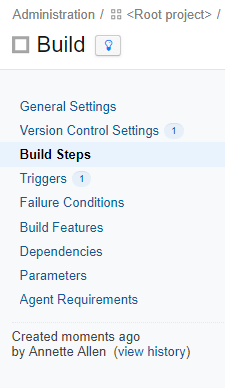
You now have a project created. By doing these steps it should have automatically setup your version control settings and the Triggers which means whatever builds you create will trigger on a push. You can tell these have been set up because next to Version Control Settings there should be a 1 and next to Triggers there should be a 1 as shown below:
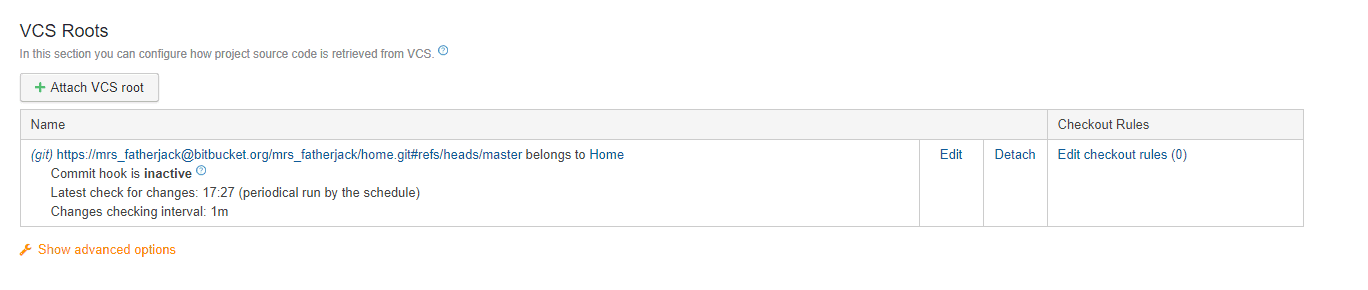
If you click on Version Control Settings you can see what’s been setup up, and obviously you can add in additional repositories as necessary.
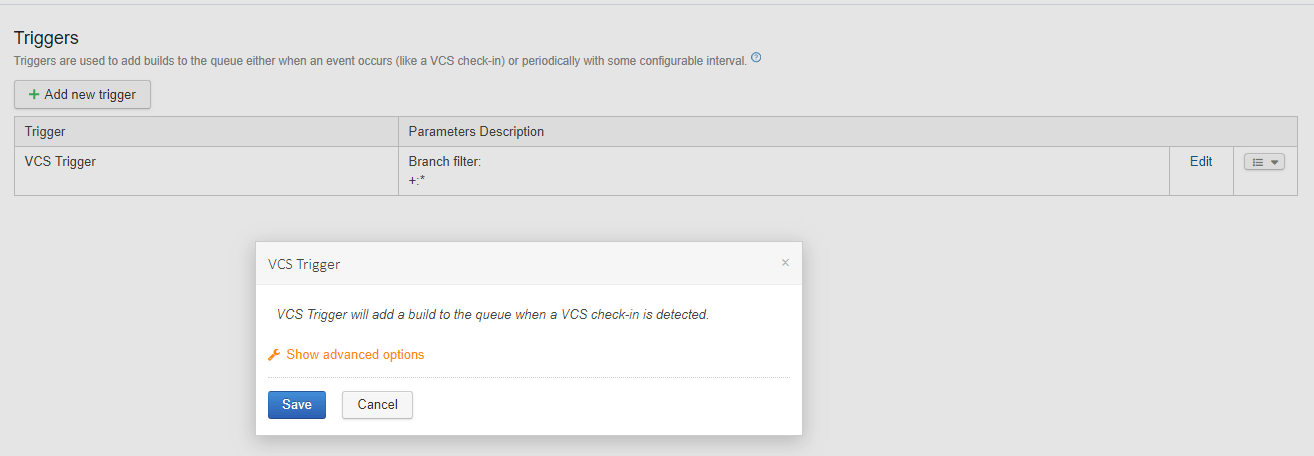
Now click on Triggers and you can see the trigger that has been set up, if you click on Edit it tells you that the trigger has been set up as shown below:
Your Team City environment should now be set up ready for you to add build steps.
This document contains proprietary information and is protected by copyright law.
Copyright © 2026 Red Gate Software Limited. All rights reserved
Load comments