Security and compliance
Ensure data security and compliance with data masking, monitoring, and change traceability
Ensure data security and compliance with data masking, monitoring, and change traceability
Monitor and understand your databases with full visibility into performance and change
Build, test, and deploy database changes with confidence
Simplify and speed up database development workflows
Prepare reliable data foundations for AI initiatives
Simplify and secure database modernization across platforms
Control costs and boost efficiency in database operations
Simplify and speed up cloud database transformation
Download this article as a PDF
As a developer, you have several options when collecting error reports for your programs.
For example, you can rely on end-users sending in their own reports by email, or you can code your own error-reporting system into your software. But these can be time-consuming and unreliable processes.
With email reporting, user response tends to be slow, and it can be hard to gather precise and accurate information – especially from end-users who are not technically literate. Writing your own error reporting system is a major undertaking and relies on your ability to forecast where errors will crop up.
The Automated Error Reporting in SmartAssembly offers an alternative.
SmartAssembly is a software protection and improvement tool for .NET developers. One of its key features is the option to add customizable Automated Error Reporting to your software.
SmartAssembly's error reports provide a complete stack trace, and the values of all the variables, when an exception occurs in your program. End-users need only click a button to send you the details.
As an example, we'll use SmartAssembly to improve one of Redgate's tools. We've been having trouble with the search function in this particular build of .NET Reflector. Let's see whether Automated Error Reporting can get to the bottom of things.
SmartAssembly uses projects to manage changes to our software, so we begin by starting a new project for Reflector. We're taken straight through to the Project Settings window, where we can configure the various additions we'd like to make to our software.
We move straight down to the Automated Error Reporting heading in the main window, and select I want errors reported in my application. This opens up further settings, as shown in Figure 1
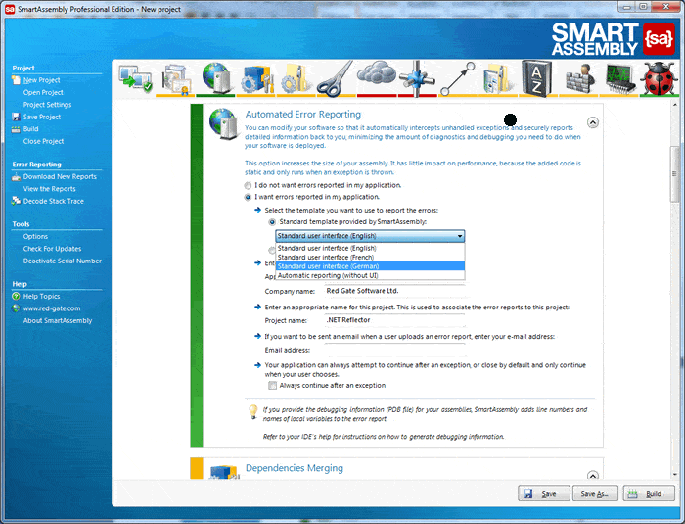
Here, we can configure our error reports. The most important decision is what information they should give us. This is handled with templates, and we have three choices: standard, automatic, or custom.
SmartAssembly's standard template gives us the stack trace and variable values. Automated Error Reporting gives us the same information but without any user interaction – the report is sent automatically whenever errors occur. Custom reporting lets us add extra information to our error reports.
Since the standard user interface should give us all we need, we'll stick with that. Here, we can also change the language our error reports will appear in, but we'll leave them in English.
Our company and application names will appear in our error reports, and are detected automatically, so Red Gate Software Ltd and .NET Reflector appear by default. We've got the settings we want, so we click the Build button to add error reporting
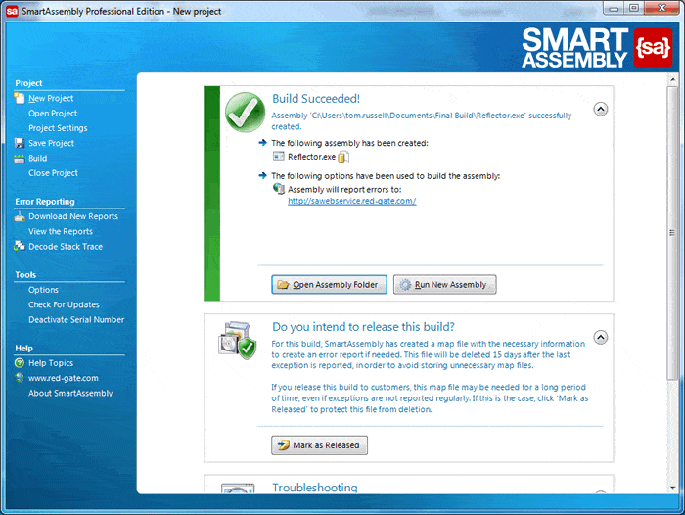
With the build complete, we can close SmartAssembly and begin playing with .NET Reflector to check for bugs.

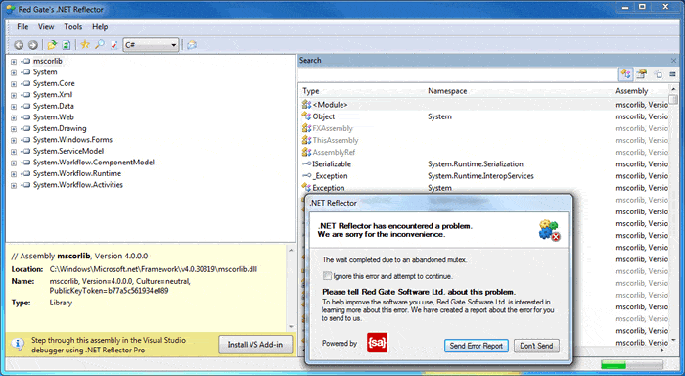
The error reports are created automatically whenever .NET Reflector throws an exception, so we just need to keep working with Reflector until we hit one. We know there have been problems with the search function, so we begin there.
As we suspected, trouble strikes when we try to run a search, so we send in the error report to get the full picture.
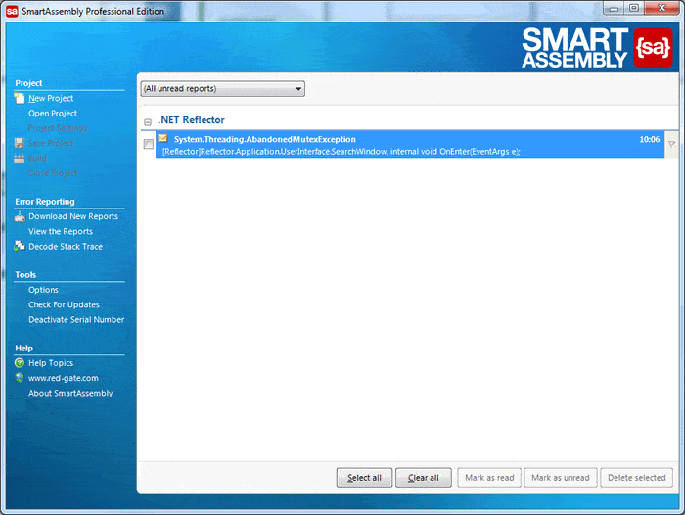
To see the details, we need to go back into SmartAssembly, get our new error report with the Download New Reports button, and then select View the Reports. Now we can check what went wrong with Reflector.
When we open the report, we can instantly see details such as the product version and the operating system it was run on, but what we're really interested in is the stack trace. To check it out, we just need to expand this section.

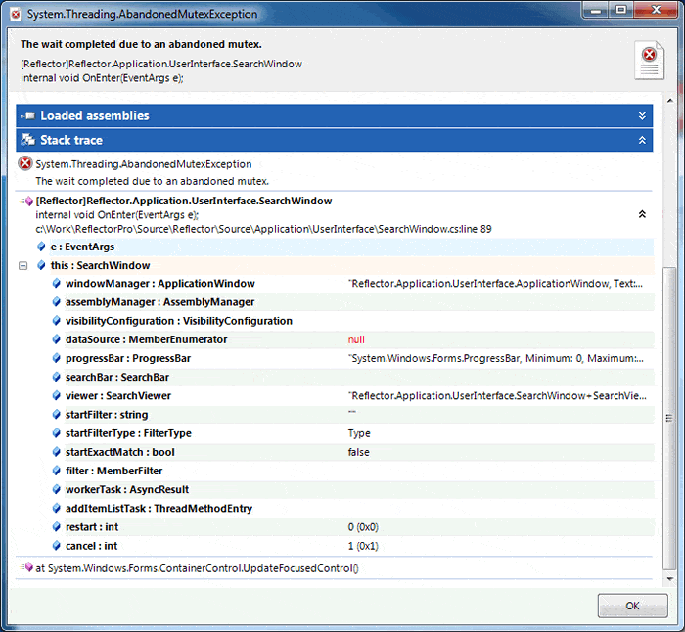
The stack trace gives us the values of all the local variables, enabling us to pin the problem down quickly.
By gathering all the data with SmartAssembly, we don't need to waste time emailing back and forth with the end-user, trying to get an accurate description of the problem, and we can focus on fixing the error straight away.
Download a 14-day free trial, and start improving your .NET releases.
Download free trial